![abtrace-logo-colour@2x-3.png]](https://help.abtrace.co/hs-fs/hubfs/abtrace-logo-colour@2x-3.png?width=124&height=60&name=abtrace-logo-colour@2x-3.png)
You can now edit the filters on an existing recall directly within the User Management Portal. If you've missed an exclusion, need to add a new clinical indication or task, or want to include or remove opportunistic patients, you can update the recall in place instead of recreating it.
Once you save your changes, the system automatically recalculates the recall population for you.
Why This Matters
-
⌛Saves time: update a recall in just a few clicks
-
🧹Fewer duplicates: no need to create a new recall everytime something changes
-
🎯Better targeting: refine filters for a more accurate patient list
-
🧠Flexible and intuitive: adjust exclusions, indications, tasks and more - all from one place
💡This feature is only available to Admin users.
How to edit an existing recall (video)
Prefer written steps? Here's how:
- Log in to the User Management Portal
- From the left-hand menu, select Automated Recalls
- Select the recall you'd like to update
- From the Overview tab, click Edit recall patient filters
- Adjust filters using the dropdown - search and tick the boxes you need
- Update any combination of filters, including exclusion criteria, tasks, monitoring status, birth month, days overdue, priority order, and registered GP
- Click Save, review the confirmation message, then select Update Filters to apply your changes
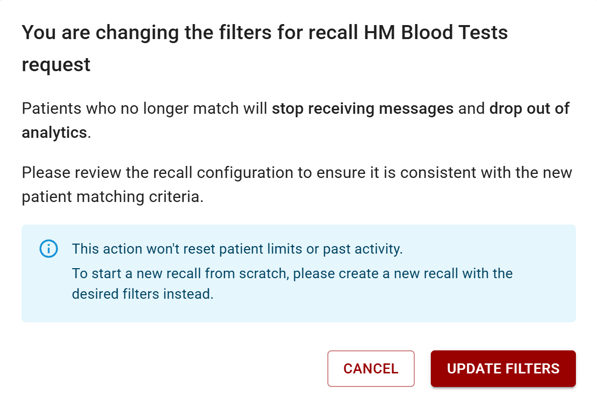
You're all set - your filters are updated and the recall population will recalculate automatically.
💡Want to check you've applied the right filters? Select Duplicate filters in Desktop App within the recall Overview tab to populate the filters in the Proactive Monitoring Tool.