In the below article, we show you how to setup the automated messaging functionality for your practice. We have a separate section explaining how to configure the automated messaging. This section is for customers using the EMIS version of the Abtrace Proactive Monitoring tool.
Step 1: Create a new user within EMIS Web
- In EMIS, click on
Configuration>Organisation Configuration>Add>Add New User

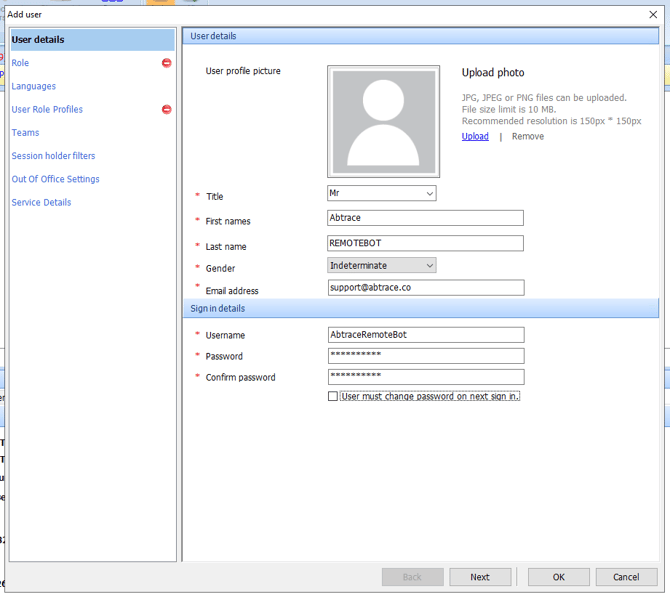
User details pane
- Complete the following fields:
- Title: Mr
- First names: Abtrace
- Last name: REMOTEBOT
- Gender: Indeterminate
- Email address: aupport@abtrace.co
- Username:
AbtraceRemoteBot - Password: Enter a password of your choice - please make a note of this for later. Must meet the following requirements: at least 16 characters
- includes uppercase letters
- includes lowercase letters
- includes numbers
- User must change password: untick this option
- Click Next
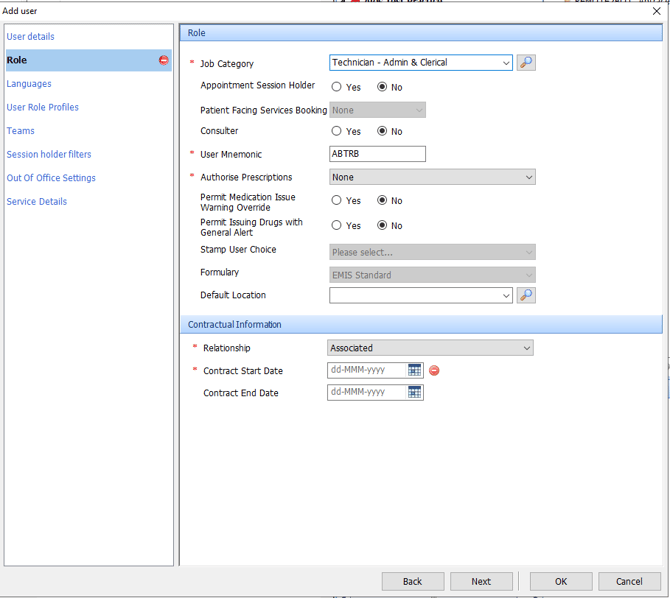
Role pane
- Job Category: we suggest "Technician - Admin % Clerical" which is found under Admin/Clinical Support
- Appointment Session Holder: No
- Patient Facing Services Booking: None
- Consulter: No
- User Mnemonic: we suggest ABTRB
- Authorise Prescriptions: None
- Permit Medication: No
- Permit Issuing: No
- Relationship: Associated
- Contract Start Date: we suggest today's date
- Press Next twice (or click straight to User Role Profiles pane)
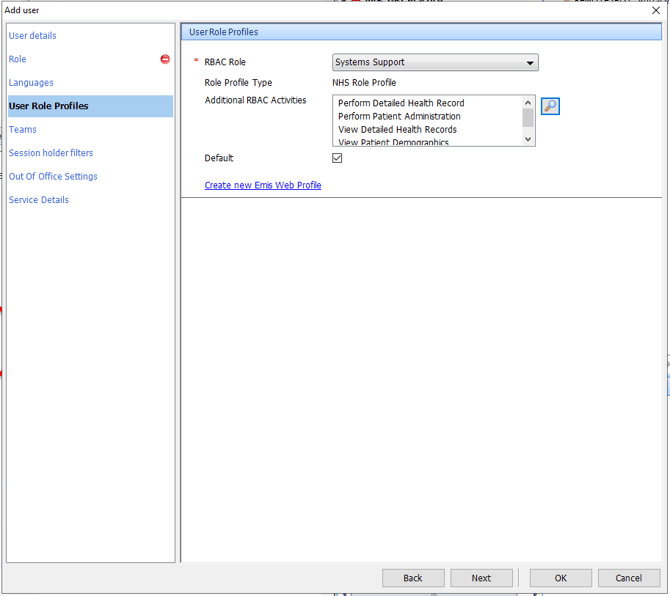
User Role Profiles pane
- RBAC Role: Systems Support
- Additional RBAC Activities: add the following four roles individually by entering the code in the search bar.
Within the search results, double click the appropriate item to ensure the role appears in the Selected Items:B0360: View detailed health recordsB0380: Perform detailed health recordB0560: Perform patient administrationB0820: View patient demographicsGetPatientSequence B0820GetBookedPatients B8012GetMedicalRecord B0370GetBase64AttachmentData B8010GetOrganisation B0360GetChangedPatientsMedicalRecord B0820SetAppointmentStatusAutoRefresh B0560FileRecord B0380 - Default: ticked
- Click OK to save the new user The additional roles should display as follows:
Step 2: Activate the Partner API & allow the new user
- Go to:
System Tools>EMAS Manager>Partner API - Select
Abtrace PAPIand make sure the product is active by checking that a green tick is next to the name. If this is not the case, click on the `Activate Application' button on the toolbar.
- Click the Edit Users on the toolbar:

- Locate
AbtraceRemoteBotin the User Logins (this column can be sorted alphabetically by clicking on the User column heading). Tick the user:
- Enter the same password you entered in step 1, and click OK. Then click OK on the Edit Users box:

- With
Abtrace PAPIstill highlighted, click Login Access on the toolbar:
- Locate
AbtraceRemoteBotand tick both Auto Login and Allow Login for the user (this column can be sorted alphabetically by clicking on the User column heading):
Step 3: Activate Automated Messaging in the portal
- Head over to the portal and login
- Select your organisation
- Click on the
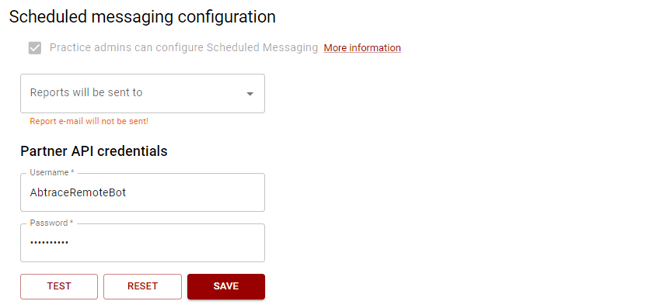
Automated Recallstab on the left hand navigation panel - Scroll down to the
Scheduled messaging configurationsection. - Fill in the credentials to the new user created in
Step 1- AbtraceRemoteBot and the password you put in Step 1 - Click on
Save. - Then please send an email to support@abtrace.co to say that your Partner API has been setup (include your practice name and ODS code). You will then receive a confirmation that all is ready to use, and an invitation to a training session.
Check out this guide to find out more about this functionality.